Lemans #2 Episodes start here.
------------------
Episode one, introduction.
Episode two, trunk panel install part one.
Episode three, trunk panel install part two.
Episode four, door rust repair.
Episode five, tail light panel and rear crossmember.
Episode six, passenger quarter panel.
Episode seven, driver's quarter panel.
Episode eight, floor pan and rockers, part one.
Episode nine, floor pan and rockers, part two.
Episode ten, frame repair and prep, body drop.
Episode eleven, radiator core support and miscellaneous rust repair.
Episode twelve, trunk repair and more miscellaneous rust repair.
Episode thirteen, fender and inner fender repair.
Episode fourteen, panel prep and block and prime.

---------------
Hear Ye, Hear Ye.
This is a milestone. After 9 months of work, working Wednesdays and Saturdays, I am proclaiming the body shell's rust repair to be ended. Finished. All done. Completed.
It's been an arduous journey.

Over the course of this build I bought several reproduction panels (trunk pan, tail light panel, both quarters, both rockers, and passenger compartment floor pan). In addition I bought the OEM passenger door mentioned above.


I then filled in the welds and ground it all smooth:

A little bit of plastic filler:


I also took a picture of the headlight area so as to remember how to assemble it:


I entered into this knowing it would involve many difficult deep-dive repairs. But even though I've done much of this sort of work before I was still not prepared for how difficult this car would be. This is a major pitfall of the car hobby: Even knowing it will be hard, it's always harder than you thought.
Given this, I am quite literally surprised that I didn't screw it up to the point of making it junk. Or kill myself. Or even experience a serious injury. I succeeded in every single task. The car came out solid, square, and everything lines up.
In the very first episode I invoked Jesus' help, and He did.
This first punch list is largely complete:

In episode one I outlined my strategy for working on the car. Stage One was body shell repairs. This is the stage I'm proclaiming as complete. Stage Two is the repair of the bolt-on sheetmetal repairs. Which means I have moved on to stage two.
Actually, I have been doing some Stage Two repairs already, like the passenger and driver door and the trunk lid. In particular, the door repairs were necessary in order to properly fit the quarters and the floor pan.
I've also been doing some Stage Three repairs (bodywork) in many of the episodes, but really just rough-in bodywork. There's a subsequent episode for the finish bodywork.
In today's episode I'll be addressing the last of the Stage Two repairs The fender patch panels, fender dents, and the repairs to the inner fenders.
Over the course of this build I bought several reproduction panels (trunk pan, tail light panel, both quarters, both rockers, and passenger compartment floor pan). In addition I bought the OEM passenger door mentioned above.
I needed a driver fender. I recently bought this OEM unit from a fellow in New Jersey:
It's a generally decent fender, though the bottom area behind the tire will require a patch panel. That's one of the repairs covered in this episode.
Like the replacement passenger door, the purchase of this fender was mostly due to excessive collision damage to the original fender. I considered it unrepairable:
The damage you don't see it that the lower eight inches of the vertical brace and lower edge of the fender are almost completely gone. I could have fixed those, but you can also see that the pucker and crease at the door jamb is pretty severe. And the dent in front of the tire affects the entire front half of the fender, including the wheel opening. Lastly, there's a smaller dent at the very top of the wheel opening.
In other words, there isn't a single part of this fender that doesn't need to be fixed.
When sheetmetal is so deformed and creased it requires a very skilled person (not me) and a lot of hours to just get it straightened, let alone fixing the rust. I just couldn't do it. For a total of $516 I got an OEM fender that isn't bent and twisted out of shape, and that saves me literally months of work and frustration. Plus, I don't have to mess with a reproduction fender, which can be poorly fitting.
The replacement fender had some rust, which someone tried to hide with plastic filler. It was the seller who found this deception when he bought the fender, and he just couldn't live with it. So he listed the fender on Faceborg marketplace, including pictures of the damage. So I knew about it and knew I could fix it.
Let's start there. Here's that rust:
I began by turning the fender upside down and putting it on a folding work stand to hold it, then I cut out the rust:
I decided to retain the inner brace, which was pretty solid (picture, left). I also kept the wheel opening flange (picture, right), including the rectangular trim hole (a mistake since I later decided to fill many of the trim holes), and the lower lip where the fender bolts underneath the rocker (picture, top). All this was solid. However, the door jamb flange was rusty, so I cut that out (picture, left).
It's an advantage to keep as much of the perimeter as possible, because it means the shape of the fender can be retained. Keeping the inner brace was a bonus.
I bought the pair of patch panels on ebay. Here's the driver's side:
I drilled out the spot welds holding the brace and also cut off the offset flange at the top and door jamb flange.
I wire brushed the brace area, welded up a couple of rust holes I found, and brushed on some POR15:
POR15 likes to move when it's wet, so I sort of globbed it on between the sheetmetal and the brace (picture, lower center). It flowed down (that is, up towards the top of the fender) several inches.
I again used the cut and butt method to weld in the replacement panel. I first cut in 2-3 inches on the left end of the horizontal seam to in order to match to the edge of the fender. This also was necessary to push the replacement panel flush with the existing fender surface.
I overlaid the new panel on the top of the fender surface, pushed the left horizontal edge flush, and added a few spot welds spaced about four inches apart across the bottom.
I carefully double-cut the metal, starting left and moving right on the horizontal seam until I got to my next spot weld. I fished out the waste metal from behind and pushed the patch even with the original metal, adding a spot weld or two. I double cut to the next spot weld and repeated. Once I got close to the right corner I double cut upwards about four inches, which allowed the corner to be pushed in even, and added a couple more spot welds.
I continued up, and once I got close to the top corner I cut horizontally from the upper right corner leftwards about four inches. This allowed the corner to be pushed in even. A couple more spot welds, then I continued double cutting until I got to the top left. Again I fished out the waste metal, then added a bunch more spot welds:

Yes, the application is ugly. The wheel opening has a concave area, which makes applying filler there sort of difficult.
Despite the ugly plastic filler, this is probably my best work so far. The replacement panel was a nice fit with good contours, the welding went very well, and it ground out pretty flat. And it took me about half a day to complete.
I put on a couple of layers of glazing putty, keeping it very thin:
And some primer:
As I've noted before, I'm not trying for perfection at this point. The final body work (stage three) will be done later.
Fitted to the car:
Very happy with this.
I started sanding out the rest of the fender and found additional damage:
Honestly, I thought it was going to be more severe, but it turned out that someone had put on a lump of filler and simply didn't sand it. When I sanded it out it came out nearly flat and wasn't very thick. I just put on a thin layer of glazing putty and primered it:
Can't complain about that.
I took off the fender and started cleaning up the inside:
I wanted the inside to pass muster with the guys who like to feel the inside cavities of body panels to see if they've been hacked together, so I ground down and smoothed the welds and put on some glazing putty:
Undercoated:
Now it's time for the passenger fender. Here's the original fender, which I considered fixable:
Fixable, but a mess. You can also see the damage to the original door, necessitating its replacement as previously mentioned. And you can also see the original rusty rocker, which was replaced in episode 9.
This fender does not have a huge amount of other damage but the lower fender area was warped, crooked, and twisted.
Here's what that looked like:
Really nasty. This is going to be more difficult than the driver's side because of the previous "repair" and the fact that the brace is not intact, which means the area had no structural integrity. This required some careful work to get the lower fender line to lay straight on the car.
The first thing was deciding where to make my cuts. Unlike the driver's side I needed to use the brace that came on the replacement panel. The fender's wheel opening portion was in good condition (below pic, left) which made the job a bit easier by providing a solid reference point.
So I cut vertically, including through the lower flange and retaining the the rectangular hole (again, I should have deleted it because I had to weld it closed later).
Then, my horizontal cut went all the way through the door jamb flange:
I measured the length of brace on the replacement panel and marked it on the original brace:
Like the driver's side, I cut off the offset flange from the top of the replacement panel since I would be doing a cut and butt, and I also cut off the wheel opening flange. Unlike the driver's side, I retained the replacement panel's lower flange.
I then installed and shimmed the fender so that the gaps were correct. This took a couple of shims on the top of the cowl and one shim in the door jamb mount. I slid the patch panel in and loosely bolted it with two shims on the lower mount. I put a clamp on the wheel opening side to hold the character line in place:

You can also see where the door lip is pushed in. I repaired that in another episode.
This was extremely floppy at this point, so I took some care to make sure everything was straight and aligned. There were two adjustments to be made, the horizontal line along the bottom of the fender so as to match to the rocker, and the curve at the door jamb. My wife held a straightedge horizontally on the rocker as I aligned the bottom edge and tightened the lower mount bolt to hold it in place.
I found that pushing against the replacement panel made it slide up over the top of the fender metal which varied the shape of the fender curve in relation to the door curve. Cool. So I pushed it in until the curve in the fender matched the curve in the door and made a mark at the intersection of the the old and new metal at the door jamb. I removed the replacement panel and made a 2-3 inch horizontal cut at the mark. This cut was needed to get the original metal out of the way to allow the replacement panel to be pushed even with the original fender surface and also to align the vertical line.
I put the replacement panel back in, aligned the bottom again with the straight edge, and pushed the fender in until the replacement panel touched the horizontal cut. As I pushed in the fender the replacement panel slid up to the cut and stopped right where the curve of the fender matched the curve of the door. It was perfect.
When I was satisfied I tacked it. I rechecked with the straightedge, verified the horizontal character line matched at both ends, and then added a few more tack welds:
So far so good. I took the fender off and put it upside down on my folding work stand. I did a cut and butt along both the horizontal and vertical seam:
Things were starting to get a lot less floppy. At this point I put the fender back on the car and re-shimmed it. Everything lined up, so I took the fender back off and welded the inner brace and filled in the spot welds. Here it is ground smooth:
I'm pleased with how this came out. It took about six hours.
Notice the damage to the wheel lip. This is a good view of it. I cover the repair of this below.
A thin layer of plastic filler:
Some more work:
Here you can see I've started to work a dent above the patch area, and also there's damage to the top of the wheel opening that needs to be taken care of. I cover that below.
And some primer:
Fitted to the car:
You can also see I fixed the front lip of the door.
The fender's fit is really nice except for where the lower fender meets the rocker. You might remember that when I replaced the rocker I retained its front cap. But the patch panel has a different curve and sits proud of the rocker. Therefore, since the rocker is in its original position the lower fender replacement panel is incorrectly stamped. I will probably have to modify this, but right now I'm not in the mood.
Let's move on. As mentioned, there is a dent in the wheel lip with secondary damage around it. This is the last thing to fix on this fender.
I noted the pic above (5th back) with a better view of the damage. Here's another angle, not as good:
It's easier to see in the other pic, the fender lip was pushed in abut 3/4", and the damage carried into the panel above the lip.
My first idea was to immobilize the area with a couple of ratchet straps and put a bottle jack horizontally inside the fender:
This got me about 1/4" but was sort of hard to manage.
The next idea was to work from the other side:
This got me another 1/4" but it had a tendency to roll the lip out.
The third method got me the rest of the way. I removed the fender and laid it face down on a heavy rubber floor mat (above, lower right). The rubber mat was pretty rigid but had enough give to allow the wheel lip to move as far as I needed it to move. I hammered it out by putting the end of a piece of 1/4" plate steel against the inside of the lip, giving it one or two hits at a time with my small sledge, then checking it with a straight edge. It took at least a dozen whacks.
Though the straight edge seemed to show the fender lip as straight, I hung the fender two or three times to see if it actually looked straight. Even though the straight edge looked good, the fender when on the car still didn't look quite straight. So I kept at it until it was right.
After dollying some minor damage it was ready for a thin coat of glazing putty:
It was quite good at this point so no plastic filler was needed.
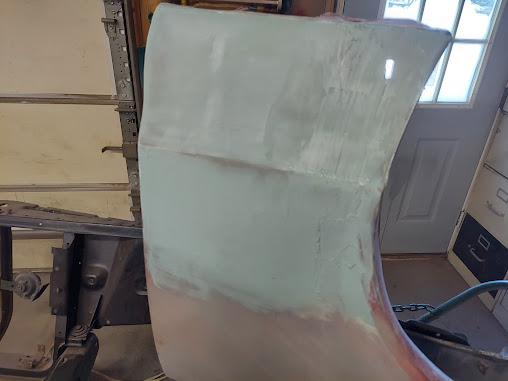
Here it is with some wet primer, which shows it's pretty straight:
And here's the finished fender:
I welded closed the fender emblem holes:
I sanded and undercoated the inside surfaces:
The fenders are now done.
Now on to the inner fenders. First the passenger side. This is the front edge, standing in front of the car and looking down:
I took the sheetmetal splash shield out from underneath:

I also removed the headlight extension, then cut out the rust:

Welded and ground:

A layer of glazing putty:

There was also rust on the rear lower area:

There is supposed to be a tab for bolting the lower fender but that was completely gone (above, center left.) Using the the intact driver's side as a guide, I rebuilt the tab:

In this pic the part is upside down compared to the previous pic.
I left it long until I could test fit it. I also waited to drill the bolt hole until I could get it back on the car, which was the next step:

Just to get you oriented, this is the underside of the passenger lower rear fender. From top to bottom you see the inner fender, the lower fender flange, a c clamp, and then the bolt hole which mates with the mount I just recreated. Just behind the c clamp is the bolt that attaches the fender to the lower body.
So I made my mark through the empty hole, removed the inner fender, and drilled a hole on my mark.
That takes care of the mounting tab. Now for the long patch of rust near the tab.
I cut out the rust:

It just so happened that I had a scrap piece that already had the offset stamped into it, so I cut a piece and welded it in:

Back side:

And a thin layer of glazing putty:

Here it is mocked up:

Now let's move over to the driver's side, where the front corner had some rust.
Here's the before:

It actually didn't look too bad until I took the wire brush to it. The corner was perforated with rust so I cut it out:

I had to cut back farther in order to find solid metal.
I bent up a piece of scrap on my bench vise and fitted it:

Welded in and a layer of glazing putty:

I put a wirebrush on my angle grinder and went over both inner fenders, inside and outside. I took some sandpaper to the areas that would be visible from the engine compartment. Then I POR15d everything. Driver's side:

Passenger side:


That wraps up the inner fenders.
At this point I have more work left on some minor dents in various places, and some welding and grinding left to do, but I am ready to declare the stage two repairs as complete.
Now my attention is turned to Stage Three, the sand and prime and sand prime and sand prime and sand process to make the body paint ready. That will be documented in the next episode.
Here's my new punch list, many of which I've already done:

These are mostly small tasks.
There's daylight at the end of the tunnel as I press on toward my final goal of a rust free, fully bodyworked body by 4/1/24, one year after starting the project.
No comments:
Post a Comment