October 5th, 2024:

October 6th, 2024:

Episode one, introduction, here.
Episode two, disassembly and assessment, here.
Episode three, rough body work, here.
Episode four, quarters, here.
Episode five, toe panel, rockers, here.
Episode six, fenders, inner fenders, here.
Episode seven, the doors, found here.
Episode eight, tail light panel, hood, found here.
Episode nine, Hood, trunk, windshield gutter, cowl and firewall, heater box, found here.
Episode ten, Back glass gutter, grill, found here.
Episode eleven, headlight extensions, core support, roof, found here.
Episode twelve, final body prep and reassembly, found here.
Episode thirteen, bonus episode, final photos, found here.
------------------
As of 6/11/25 I have finished the car to the stated goal, i.e., the major bodywork is done and the car is roughly reassembled. On 6/2/25 I put the car up for sale.
5/9/25 We have now reached the point where the major bodywork is done. Hooray. This required 5 16 oz tubes of glazing putty and 3 1/2 quarts of Bondo (of course, most of these ended up on the floor as sanding dust). In addition, I sprayed approximately 2 gallons of primer, much of which also was sanded off.
Every panel has received at least three coats of primer (the roof, passenger fender, and passenger quarter required four). This does not mean a coat is merely a once-over spray. A coat of primer usually consists of two or sometimes three passes, allowing for a good buildup of material that can be sanded flat.
By this repeated priming and sanding all the surfaces have assumed their proper shape and contour, plus the gaps are good and the panel alignment is good.
A small magnet sticks everywhere, which confirms my objective to be at a max of 1/8" of filler. It's considerably thinner than that over most of the body. Probably the thickest filler is right above the lip of the rear wheels. It took a gargantuan effort to rebuild the quarter lips and make them straight, as discussed in Episode four.
5/22/25 Friends Taylor and Marcus helped me roll the car outside, and I took a couple of pics out in the daylight:


There's nothing like daylight to show all the flaws. The car actually looks pretty darned good, which is great validation for my work.
Undercarriage
The reason we rolled it outside was to turn it around so that I could utilize my chain hoist:

I needed room to crawl under the card and wire brush the undercarriage:

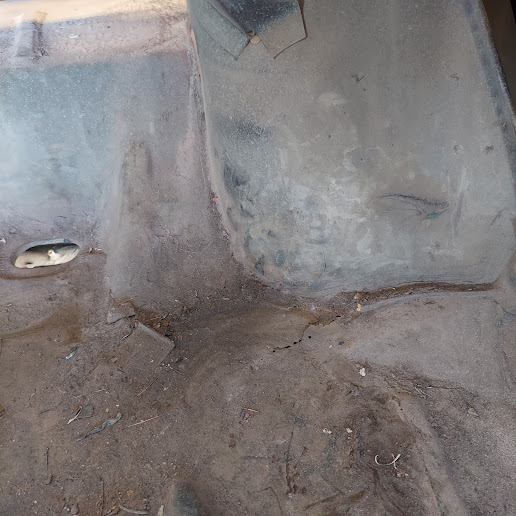
Way back in Episode two during the assessment of the car I noted that the condition of the underfloor was remarkable. Now we can see how true this is. I have never owned a old car that looked like this does. It's truly amazing.
Sprayed some bedliner:

Job done. Starting to look like a car:

I cleaned up the inside surfaces of the quarter panel welds and sprayed some undercoat:


Surprise One
Careful readers will notice a trunk pan repair, center left above. Yep, rust. While cleaning up my quarter panel welds I just happened to notice this little flaw:
That jagged little dark line is rusted sheetmetal. Surprise.
I guess it was hidden because of all the dust and debris, but now that it's discovered it has to be fixed. I wire brushed the area:

It's not that bad, really. I'm at the point that I've done so many of these repairs it's old hat. Though this is a time-waster, it's an easy fix.
I cut out the rust:

POR 15d the interior structure:


Welded it in:

Dressed it out:

Seam sealed and primed:

Done.
Notice the little dents in the wheel house. I'm guessing the car wore some broken chains in the winter. I didn't bother to fix them.
Body Prep
Body prep is the correction of minor flaws in the underlying body work. I wanted to get as many of these flaws fixed as possible. I've been engaging this process since the very first panel was primered months ago, and I could spend months more, if I were to keep the car for myself.
Whenever I find one of these I put on a finger swipe of putty, then sand it out. This pic is of a shallow deformity on the driver's door upper right corner:

This is what's required, every surface examined from every angle, turning parts over, shining a bright light while laying on one's back... a lot of detail work. These repairs will then be spot-primed.
So because it's a never-ending process in pursuit of perfection, and also because this will be someone else's car, I reached the point of proclaiming it done.
Reassembly
I want the car to look as much like a car as possible. So I bolted as much of the car together as I could. That will also give me the opportunity to align gaps, test fit parts, and locate the various pieces that are in boxes on shelves somewhere.
I started with the dash:

The car came with two dash pods and two gauge clusters. The pod in the car was cracked and pretty rough, but the spare wasn't too bad. I combined the best parts together and installed them along with the grab bar, dash pad, steering column, and brake pedal.
It seems like there is an order of installation. If I did it again I would put the heater cables on the heater box and install it, then put the gauge pod in close enough to hook up the other ends of the heater cables, the electrical connections to the pod, and the speedo cable. There are five screws for the bottom of the dash and five more that screw up though the dash into the dash pad. But since this is just a mock up I just put it in well enough to hold it in place.
Then went in the glove box door and grab handle. After that, the steering column.
6/4/25 Installed the seats, kick panels, and emergency brake:

That floor board repair (Episode five) looks pretty darned good.

The back seat is original, but the fronts are from something else. They look a lot like this second gen Camaro:

And the attachment points happen to be exactly the same.
6/7/25 Installing the latches, wing windows, and door glass. There is a particular order to install these mechanisms. First, I installed the belt trim , which ordinarily would be followed by the window felts. However, I didn't bother to buy window felts. I installed the lower center window stop bracket. Then comes the door latch. I attached the door locking lever and the inside door pull lever to the door latch, slipped on their retaining clips and installed the latch in the jamb with four short phillips head screws. The inside handle gets screwed to the inside of the door with three bolts.
Then the outside handle. The wing window is next. It has two "umbrella" adjustment screws, one at the lower end to adjust it out and in, and another in the front door jamb to adjust forward backwards tilt. There is also a chrome bolt at the top of the front jamb as well as a short chrome metal screw. There's a short metal screw inside the door through the access hole top center, and a long chrome screw that goes from hole above the door panel and into the wing window structure.
That's a lot of hardware.
Next, I installed the rear glass channel. It has one adjustment umbrella bolt at the bottom and another at the top in the rear door jamb. That one gets a chrome nut.
Everything gets bolted loosely for now.
Now we're ready for the window riser mechanism. It slips in the rear access hole and is installed with four bolts around the window crank. I slid the horizontal guide onto the window roller and put in the two bolts. Then, with the window cranked up until the two rollers stick up past the top of the door, I slid in the glass. I removed the rear window guide, it's a piece of cast zinc (?) shaped like an ax head. You'll probably also need to remove both the up stop (front of the glass channel) and the down stop (back of glass channel) to allow the glass to be cranked back down into the door.
Once the window is rolled down a few inches you can reinstall the two stops and the rear window guide through the access openings. Then, adjust the up and down stops to prevent the glass from going too high or low, adjust the mounting screws on the wing window and rear channel until the glass fits against the weather stripping when the door is closed.
Here's the results:


6/11/25 Surprise Two
The driver's side was missing an important piece. It's the rear guide bracket that interfaces with the window track. I mentioned it regarding the passenger side glass installation, it's the chunk of cast zinc (?) shaped like an axe head. I couldn't find it anywhere, if I ever had it.
The piece is not available by itself. I'd have to buy the entire lower assembly. So I did what I always do: I made something from scratch. I found a piece of 3/16" thick aluminum in the scrap pile and used the passenger piece as a template. I cut it out, shaped it, tapped a couple of holes, painted it gray, and rubbed a bit of candle wax on the edge.
Installed:

This worked perfectly. Another problem solved.
Moved to the underhood area, put in the gas linkage, master cylinder, steering, and brake lines:

As you can see, I didn't clean up the suspension. The person who buys this car, if he's worth his salt, will at the very least upgrade to tubular a-arms and dropped spindles. So it's a waste of my time to clean up these parts.
On to the front assembly. The fenders are already on the car, as is the hood and nose piece, which I repaired in Episode ten. First I installed the hood latch and the inner fender splash shields (no pics, sorry). Turns out the splash shields need to be installed before the bumper.
Then comes the headlight extensions, which we repaired in Episode eleven. But as I mentioned in that episode, some of the mounting holes are in different locations. I wonder if it has to do with the 1966 fenders. No matter. They are just mocked-up for sale, so the new buyer needs to disassemble it all anyway. The extensions can be easily be modified before painting.
Next comes the vertical support that connects the underside of hood latch to the lower bar of the radiator support. Then the lower horizontal grill brace, which connects with four bolts to the sides of the headlight extensions.
This brace was part of what the purchase of the GTO grill mentioned in Episode ten. I made a killer score, because I received the whole assembly in the purchase, including the this brace, plus the nose, the plastic pods, the grills, the eyebrows, and the turn signal lights.
Even though the pods were junk they were the next to go in. Lastly, the grill's eyebrow trim got installed. Remember, the passenger side goes in first, and don't overtighten.
I also installed the hood ornament, the headlight buckets and bezels, and the bumper. Now it's starting to look like a real car:

The bumper is trash, but it still fits.
What you can't see is that some of the assembly was done with hardware store nuts and bolts. The car didn't come with all of its hardware present. And some of it wasn't reusable. I do have a supply of original nuts and bolts left over from various projects, but not enough. But since the car will need to come apart for paint, it doesn't really matter anyway.
I moved to the back of the car. No particular order here. Trunk latch, tail lights, trunk trim, eyebrow trim, bumper, which also is trash.
Done:

Surprise Three
I finally got fed up with the lift kit in the rear and the ridiculous huge tires. I decided to take it out. First I removed the air shocks from the 1970s, then jacked up one side, lifting on the frame and not the axle. This allowed the axle to drop to the point where the coil spring was completely loose. I took it out and removed the various pieces of the lift kit.
Here's what it looks like

It consists of a cylindrical spacer, a spring cup, a spring retainer, and a long bolt. This all sits upon the stock mounting plate that is welded to the rear end.
Here's what the car looks like after removing it:

To me the difference is profound. Much, much better.
So what's the surprise? The fat tires hit the wheel lip:

Well, it's not exactly a surprise. I sort of expected it.
6/25/25 I got a couple of smaller tires, and now the rear is even lower, yay.
Before:

After:

Before:

Love those new LED shop lights.
After:

That's an improvement for sure.
Conclusion
My goal when I started this project in October 2024 was to eliminate all the rust, do the major bodywork, set the panel gaps, and purchase and install various trim parts in order to assemble the car. The goal was 6 months, but I achieved it in 8 months.
The car is done. Let's briefly recap how we got here:
- Fixed unexpected hidden damage (rear deck, driver's tail light eyebrow, passenger rocker, passenger door jamb, tail light panel mounting flange)
- Repaired rust on inner fender
- Reconstructed wheel openings of both quarters using 1967 Chevelle patch panels
- Installed patch panels for both lower rear quarters
- Resurrected a badly crushed passenger fender
- Fixed hood dent and trunk dent
- Bought and fixed replacement doors after considerable wasted work on the existing doors
- Modified 1966 fenders to fit 1967 nose
- Fixed nose dents
- Installed both front and rear window gutter patch panels
- Fixed both sail panels
- Fixed tail light panel
- Fixed pushed in roof
- Fixed trunk rust
One more episode to follow.
No comments:
Post a Comment